
There’s something so comforting about a really good peanut butter cookie. Not the dry, crumbly kind that falls apart too fast, but the kind with thick, tender centers, lightly crisp edges, and that rich peanut butter flavor that feels instantly nostalgic. These Soft & Thick Peanut Butter Cookies are exactly that. They’re simple, classic, and deeply satisfying—the sort of cookie recipe that earns a permanent place in your kitchen because it works every single time.
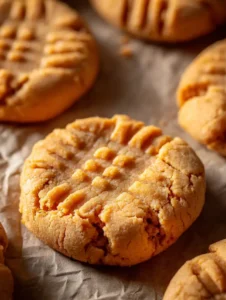
What makes these cookies special is their texture. They bake up soft and substantial, with a creamy dough that chills into the perfect scoopable consistency and transforms in the oven into thick, bakery-style cookies. The brown sugar adds moisture and chew, the peanut butter brings richness, and the sugar coating gives the outside a delicate sparkle and light crispness that contrasts beautifully with the soft center. And of course, that signature fork-marked top makes them look just as classic as they taste.
These cookies are wonderful for everyday baking, lunchboxes, holiday trays, bake sales, or simply keeping a batch on the counter for whenever a craving hits. They also adapt beautifully with chocolate chips, chopped peanuts, or even a swap to almond butter. If you’ve been searching for the best soft peanut butter cookie recipe, this one delivers the kind of thick, tender cookie people reach for first.
table of contents
Full Recipe
Ingredients
- 1 and 1/3 cups all-purpose flour
- 1/2 teaspoon baking soda
- 1/4 teaspoon salt
- 1/2 cup unsalted butter, softened
- 1/2 cup packed brown sugar
- 1/4 cup granulated sugar
- 1 large egg, room temperature
- 3/4 cup creamy peanut butter
- 1 teaspoon vanilla extract
- 1/2 cup granulated sugar, for rolling
Instructions
Step 1: Mix the Dry Ingredients
In a medium bowl, whisk together the flour, baking soda, and salt. Set the bowl aside. This quick step helps distribute the baking soda evenly so the cookies bake uniformly.
Step 2: Cream the Butter and Sugars
In a large mixing bowl, beat the softened butter on high speed for about 1 minute until creamy. Add the brown sugar and the 1/4 cup granulated sugar, then beat on medium-high speed until the mixture is smooth and fluffy, about 3 minutes. This step builds the base texture of the cookies and helps them stay soft.
Step 3: Add the Egg, Peanut Butter, and Vanilla
Beat in the egg until combined. Scrape down the sides of the bowl if needed. Add the peanut butter and vanilla extract and beat again until the mixture is smooth and creamy. At this stage, the dough base should look rich, pale, and silky.
Step 4: Add the Dry Ingredients
Add the flour mixture to the wet mixture and beat on low speed just until combined. The dough will be very soft and creamy. That softness is normal and exactly why chilling is essential.
Step 5: Chill the Dough
Cover the dough tightly and refrigerate for at least 1 to 2 hours. Longer is fine too, up to 3 days. This step is not optional if you want thick cookies that don’t spread too much in the oven.
Step 6: Prepare to Bake
Preheat the oven to 350°F (177°C). Line baking sheets with parchment paper or silicone mats. Place the remaining 1/2 cup of granulated sugar in a small bowl.
Step 7: Shape and Coat
Roll the chilled dough into balls, about 1 scant tablespoon each. Roll each dough ball in the sugar and place them on the prepared baking sheets about 2 inches apart.
Step 8: Make the Classic Crisscross Pattern
Use a fork to gently press a crisscross pattern into the top of each cookie. After pressing, reshape the cookies slightly with your fingers into thicker discs so they don’t bake too flat.
Step 9: Bake
Bake for 11 to 12 minutes, or until the edges are set and very lightly browned. The centers will still look soft, and that’s what you want. They will continue to set on the baking sheet.
Step 10: Cool
Let the cookies cool on the baking sheet for 5 minutes, then transfer them to a wire rack to cool completely.
Tips & Tricks
The number one secret to these cookies is chilling the dough. Because the dough is very soft, baking it right away would lead to spreading and thinner cookies. Chilling firms up the butter and peanut butter, which helps the cookies hold their shape in the oven and stay thick.
Use creamy peanut butter for the best texture. Crunchy peanut butter can make the cookies more crumbly, while creamy peanut butter gives a smoother dough and a more tender final cookie. Processed peanut butter works beautifully here, though well-stirred natural peanut butter can work too with slightly more delicate results.
Do not overbake. Peanut butter cookies can go from soft to dry quickly if they stay in the oven too long. Pull them out when the centers still look a little underdone. They will finish setting as they cool on the hot baking sheet.
The sugar coating is more than just decoration. It gives the cookies a lightly crisp, sparkly exterior that makes the soft center stand out even more. It also helps create that classic peanut butter cookie look.
If the dough gets sticky while rolling, pop it back in the fridge for 10 to 15 minutes. Working with colder dough makes shaping much easier and helps the cookies stay thicker.
Variations
One of the best things about this recipe is how easy it is to customize. If you love peanut butter and chocolate together, fold in 1 cup of chocolate chips after mixing the dough. In that case, skip the fork marks so the chips stay distributed evenly and the tops look naturally rustic.
For even more peanut flavor and crunch, add chopped salted or unsalted peanuts to the dough. This gives the cookies a little extra texture and makes them feel a bit more like a bakery-style specialty cookie.
You can also try peanut butter chips for a double-peanut version. They make the cookies sweeter and richer, which can be great for dessert platters or holiday cookie trays.
If you want to experiment beyond peanut butter, almond butter can work too. The cookies will be a bit more crumbly and slightly different in flavor, but still delicious. For best results, use a creamy, well-stirred almond butter.
For a festive touch, roll the dough balls in colored sanding sugar instead of plain granulated sugar. That’s an easy way to dress them up for holidays, parties, or themed dessert tables.
Serving Ideas
These cookies are perfect with a glass of cold milk, but they’re just as good with coffee, tea, or hot chocolate. Their rich peanut butter flavor pairs especially well with warm drinks.
They also make great sandwich cookies. Spread a little chocolate ganache, jam, or even extra peanut butter between two cooled cookies for a more indulgent treat.
For dessert, serve them slightly warm with a scoop of vanilla ice cream. The contrast between soft peanut butter cookie and cold creamy ice cream is hard to beat.
They also make a thoughtful homemade gift. Stack them in a bakery box, tin, or clear bag tied with ribbon for a simple treat that always feels special.
Storage Tips
Store the cookies in an airtight container at room temperature for up to 1 week. They stay soft best when kept well covered.
Baked cookies freeze well for up to 3 months. Let them cool completely before freezing, then thaw at room temperature when ready to enjoy.
Unbaked dough balls can also be frozen for up to 3 months. Freeze them without the sugar coating. When ready to bake, let them sit out for about 30 minutes, roll them in sugar, press with a fork, and bake with about 1 extra minute added.
The dough itself can be chilled in the refrigerator for up to 3 days before baking, which makes this a great make-ahead cookie recipe.
FAQs
Why do I have to chill the dough?
Because the dough is very soft, chilling is what keeps the cookies thick. Without chilling, they will spread more and lose that soft, puffy texture.
Can I use natural peanut butter?
Yes, but stir it very well first and expect a slightly crumblier cookie. Creamy processed peanut butter usually gives the softest, most consistent result.
Why do peanut butter cookies need fork marks?
The crisscross pattern is traditional, but it also helps gently flatten the dough so the cookies bake evenly. Since peanut butter dough is dense, the fork press gives them a better shape.
Disclaimer
This recipe is provided for general informational purposes. Baking results can vary depending on ingredient brands, measuring techniques, oven temperature, and the type of peanut butter used.

Soft & Thick Peanut Butter Cookies
Ingredients
Equipment
Method
- Whisk together flour, baking soda, and salt in a bowl.
- Beat butter until creamy, then beat in brown sugar and granulated sugar until fluffy.
- Add egg, peanut butter, and vanilla extract and mix until smooth.
- Add dry ingredients and mix just until combined.
- Cover and chill the dough for 1 to 2 hours.
- Preheat oven to 350°F and line baking sheets with parchment paper.
- Roll dough into balls, coat in sugar, and place on baking sheets.
- Use a fork to press a crisscross pattern into each cookie, then gently reshape into thick discs.
- Bake for 11 to 12 minutes until edges are set and lightly browned.
- Cool on the baking sheet for 5 minutes, then transfer to a wire rack.
Nutrition
Notes
Tried this recipe?
Let us know how it was!Conclusion
These Soft & Thick Peanut Butter Cookies are everything a classic peanut butter cookie should be: rich, tender, thick, and full of cozy homemade flavor. They’re easy enough for everyday baking but good enough to become a family favorite recipe you come back to again and again. With their soft centers, lightly crisp sugar-coated edges, and that nostalgic crisscross top, they’re the kind of cookie that disappears fast and gets requested often. Once you bake a batch, it’s easy to see why this style of peanut butter cookie never goes out of fashion.