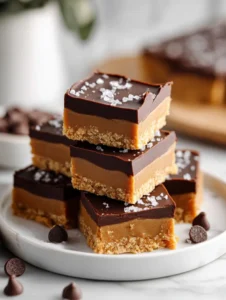

There are some desserts that instantly win everyone over, and these No-Bake Chocolate Peanut Butter Bars absolutely belong in that category. They’re thick, creamy, sweet, slightly salty, and layered with the kind of chocolate-peanut butter combination that never really goes out of style. Best of all, they come together with only a handful of ingredients and absolutely no oven time, which makes them one of the easiest homemade treats you can make.
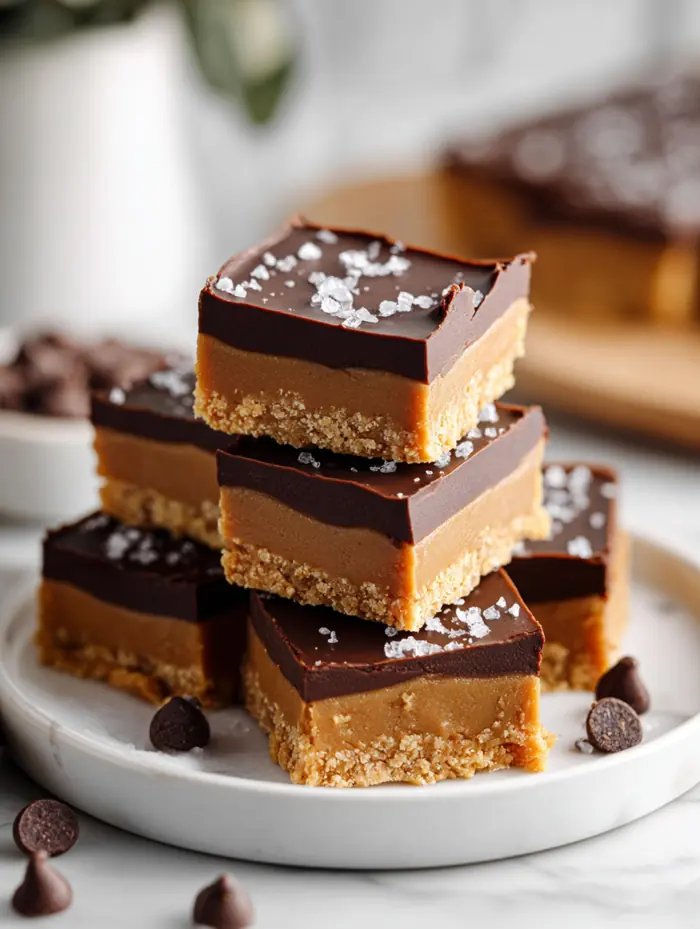
If you love the flavor of peanut butter cups, this recipe is about to become a favorite. The bottom layer is soft, rich, and packed with peanut butter flavor, while the top layer is a smooth blanket of melted chocolate mixed with just enough peanut butter to keep it glossy and sliceable. Once chilled, the bars firm up into neat squares that feel indulgent, satisfying, and perfect for sharing.
These bars are ideal for holidays, bake sales, lunchbox treats, summer desserts, party trays, or those evenings when you want something homemade but do not want to bake. They also store beautifully, which means you can make them ahead and keep a batch ready whenever a sweet craving hits. If you’re looking for an easy no-bake dessert that tastes like a classic treat shop favorite, these bars are exactly that.
table of contents
Full Recipe
Ingredients
- 1/2 cup salted butter, melted
- 1 cup graham cracker crumbs
- 2 cups confectioners’ sugar
- 1 cup plus 2 tablespoons creamy peanut butter, divided
- 1 cup semi-sweet chocolate chips
Instructions
Line an 8-inch or 9-inch square baking pan with parchment paper or aluminum foil, leaving enough overhang to lift the bars out later. Set the pan aside.
In a medium mixing bowl, stir together the melted butter, graham cracker crumbs, and confectioners’ sugar until the mixture starts to look evenly combined.
Add 1 cup of the peanut butter and stir until the mixture becomes thick and smooth. It should hold together easily when pressed.
Transfer the peanut butter mixture to the prepared pan and press it evenly into the bottom. Use the back of a spoon, a spatula, or the bottom of a measuring cup to flatten it into a firm, even layer.
In a microwave-safe bowl or small saucepan, combine the remaining 2 tablespoons of peanut butter with the chocolate chips. Heat gently until melted, stirring until the mixture is smooth and glossy.
Spread the melted chocolate mixture over the peanut butter layer, smoothing it all the way to the edges.
Place the pan in the refrigerator and chill for at least 2 hours, or until the bars are completely firm.
Before cutting, let the bars sit at room temperature for about 10 minutes. This helps the chocolate topping soften slightly so it slices more neatly without cracking too much.
Lift the bars out of the pan using the parchment or foil overhang and cut into squares. Serve chilled or let them sit out briefly before serving.
Tips & Tricks
The biggest key to these bars is using the right kind of peanut butter. Processed creamy peanut butter, like the kind that stays smooth and stable in the jar, works best here. It gives the filling a softer, more cohesive texture and helps the bars set properly. Natural peanut butter can be too oily and may make the bars less stable or more crumbly.
Press the base firmly into the pan. If the peanut butter layer is packed down well, the bars hold together much better once sliced. This is especially helpful if you want clean squares for parties or dessert platters.
Melt the chocolate slowly. Whether you use the microwave or the stove, gentle heat is best. Chocolate can seize or scorch if heated too quickly, so short intervals and frequent stirring are your friend.
Letting the bars sit at room temperature before cutting is a small step that makes a big difference. Straight from the refrigerator, the chocolate topping can be too firm and may crack when sliced. A brief rest softens it just enough for neater cuts.
For the cleanest slices, use a sharp knife and wipe it between cuts. If you want especially tidy bars, you can even warm the knife slightly before slicing.
If you prefer a thicker dessert bar, use an 8-inch pan. If you want slightly thinner, more candy-like bars, use a 9-inch pan.
Variations
One easy variation is changing the chocolate. Semi-sweet is classic because it balances the sweet peanut butter layer, but milk chocolate creates a sweeter, softer flavor that tastes even more like a peanut butter cup. Dark chocolate, on the other hand, gives the bars a more grown-up feel with a deeper chocolate finish.
You can also add texture to the base. Stirring in a little crushed pretzel, chopped peanuts, or even a small handful of mini chocolate chips can make the bars feel more layered and interesting. Just keep the add-ins modest so the base still presses together well.
If you like a little salt with your sweets, sprinkle flaky sea salt on top of the melted chocolate before chilling. It adds a beautiful finish and makes the chocolate-peanut butter combination even more addictive.
Another fun option is using cookie crumbs instead of graham crackers. Digestive biscuits work very well, and vanilla wafers can give the base a sweeter flavor. This changes the final taste just enough to make the recipe feel new without changing the easy method.
For a holiday version, add festive sprinkles over the chocolate layer while it’s still wet. That turns these simple bars into an easy party dessert with almost no extra work.
Serving Ideas
These bars are perfect served chilled, especially if you want firmer, candy-like squares. If you prefer a softer, creamier bite, let them sit out for a short time before serving.
They’re ideal on dessert trays because they cut neatly, stack well, and appeal to almost everyone. Pair them with lighter treats like fruit, shortbread, or lemon desserts for a balanced dessert spread.
They also work beautifully for lunchboxes, after-school treats, potlucks, and holiday cookie boxes. Since they don’t need to be served warm or plated individually, they’re easy to transport and share.
For a slightly fancier presentation, place each square in a mini paper liner and arrange them on a platter. That simple touch makes them feel more polished for parties or gifting.
If you want a richer dessert, serve a bar with a scoop of vanilla ice cream or a little whipped cream on the side. The contrast between cold creamy ice cream and the dense peanut butter bar is especially good.
Storage Tips
Store the bars tightly covered in the refrigerator for up to 1 week. They stay firm and fresh best when chilled.
You can also freeze them for up to 3 months. Freeze them whole or cut into squares, with parchment between layers so they do not stick together.
To serve from frozen storage, thaw them overnight in the refrigerator. They can also be enjoyed slightly frozen if you like a firmer texture.
If stacking the bars in a container, parchment paper between layers helps protect the chocolate topping and keeps the bars looking neat.
FAQs
Can I use natural peanut butter?
It is not recommended for best results. Natural peanut butter tends to be oilier and can make the bars softer, greasier, or crumbly. Processed creamy peanut butter gives the best texture.
Can I use unsalted butter instead of salted?
Yes. If you use unsalted butter, add about 1/4 teaspoon salt to the peanut butter mixture so the bars still have that balanced sweet-salty flavor.
Disclaimer
Nutrition values and final results can vary depending on ingredient brands, pan size, and peanut butter type. This recipe is intended as general cooking guidance and may need small adjustments depending on your ingredients and kitchen conditions.
No-Bake Chocolate Peanut Butter Bars
Ingredients
Equipment
Method
- Line an 8-inch or 9-inch square baking pan with parchment paper or foil.
- Mix melted butter, graham cracker crumbs, and confectioners’ sugar in a bowl.
- Stir in 1 cup peanut butter until smooth and thick.
- Press the mixture evenly into the prepared pan.
- Melt the remaining 2 tablespoons peanut butter with the chocolate chips until smooth.
- Spread the chocolate mixture over the peanut butter layer.
- Refrigerate for at least 2 hours until firm.
- Let sit at room temperature for 10 minutes before cutting into squares.
Nutrition
Notes
Tried this recipe?
Let us know how it was!Conclusion
These No-Bake Chocolate Peanut Butter Bars are the kind of dessert that proves simple recipes can still be incredibly satisfying. With their creamy peanut butter base, smooth chocolate topping, and easy no-bake method, they deliver everything people love in a homemade treat without asking much from the cook. They’re fast, dependable, crowd-pleasing, and full of that classic flavor combination that never gets old.
Whether you make them for a party, a holiday tray, or just to keep something sweet in the fridge, they have a way of disappearing quickly. And once you taste that first chilled square, it’s very easy to understand why.