
Why Make This Recipe
No-Bake Banana Split Cake is a delightful dessert that brings the classic banana split right to your table in a fun and easy way. You don’t need to turn on the oven! This dessert is perfect for warm days or whenever you crave something sweet without much hassle. It’s a great choice for parties, family gatherings, or just to enjoy at home. The layers of creamy filling, fresh fruit, and crunchy nuts make each bite memorable.
How to Make No-Bake Banana Split Cake
Ingredients :
- 2 cups graham cracker crumbs
- 1/3 cup unsalted butter, melted
- 1 tsp salt
- 16 oz cream cheese, softened
- 1/2 cup granulated sugar
- 8 oz whipped topping (e.g., Cool Whip)
- 1 tsp vanilla extract
- 3 to 4 bananas, sliced
- 20 oz can crushed pineapple, well-drained
- 20 oz strawberries, sliced
- 8 oz whipped topping (e.g., Cool Whip)
- 1/2 cup chopped hazelnuts (or your favorite nuts)
- Chocolate sauce (for drizzling)
Directions :
- Prepare the Crust: In a medium bowl, combine graham cracker crumbs, melted butter, and salt. Press the mixture firmly into the bottom of a greased 9×13-inch baking dish to create an even crust. Refrigerate the crust while preparing the filling.
- Make the Filling: In a large bowl, beat the softened cream cheese with sugar and vanilla extract until smooth and creamy. Gently fold in the whipped topping until fully combined. Spread the filling evenly over the chilled crust, smoothing the top with a spatula.
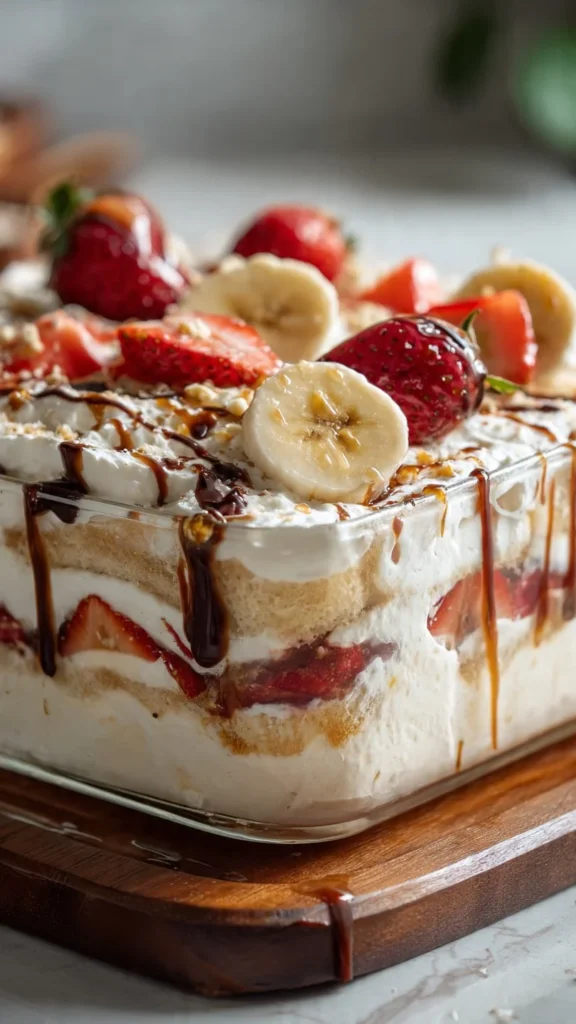
- Add the Layers: Arrange banana slices evenly over the filling. Spread the well-drained crushed pineapple over the bananas. Add a layer of sliced strawberries on top of the pineapple.
- Top and Chill: Spread another layer of whipped topping over the strawberries. Drizzle chocolate sauce over the whipped topping and sprinkle with chopped hazelnuts. Cover the dish with plastic wrap and refrigerate for at least 4 hours, or preferably overnight, to set the layers.
- Serve: Slice the cake into squares and serve chilled. Enjoy the sweet and fruity goodness of this no-bake dessert!
How to Serve No-Bake Banana Split Cake
Serve No-Bake Banana Split Cake chilled for the best flavor and texture. You can plate the squares individually and add extra chocolate drizzle or chopped nuts on top for a nice presentation. This dessert is sure to impress your guests!
How to Store No-Bake Banana Split Cake
After serving, cover any leftover cake with plastic wrap or store it in an airtight container. Keep it in the refrigerator, where it will stay fresh for about 3-4 days. The cake may become softer over time, but it will still be tasty.
Tips to Make No-Bake Banana Split Cake
- Make sure to drain the crushed pineapple well to avoid a soggy cake.
- Use very ripe bananas for a sweeter flavor and better texture.
- For extra crunch, toast the chopped nuts lightly before sprinkling them on top.
- You can substitute other fruits based on your preference, such as blueberries or raspberries.
Variation
Feel free to get creative! You can add layers of chocolate or peanut butter pudding for a different flavor twist. Switch up the nuts for your favorites, like almonds or pecans. There are many ways to customize this recipe to make it your own!
FAQs
1. Can I use different fruits?
Yes, you can use any fruits you like! Just ensure you slice them evenly and enjoy experimenting with various combinations.
2. How long does this cake last?
No-Bake Banana Split Cake will last in the fridge for about 3-4 days. Just cover it well to keep it fresh.
3. Can I freeze this cake?
While you can freeze it, the texture may change once thawed. For best results, enjoy it fresh or chilled within a few days of making it.
No-Bake Banana Split Cake
Ingredients
Method
- In a medium bowl, combine graham cracker crumbs, melted butter, and salt. Press the mixture firmly into the bottom of a greased 9×13-inch baking dish to create an even crust.
- Refrigerate the crust while preparing the filling.
- In a large bowl, beat the softened cream cheese with sugar and vanilla extract until smooth and creamy.
- Gently fold in the whipped topping until fully combined.
- Spread the filling evenly over the chilled crust, smoothing the top with a spatula.
- Arrange banana slices evenly over the filling.
- Spread the well-drained crushed pineapple over the bananas.
- Add a layer of sliced strawberries on top of the pineapple.
- Spread another layer of whipped topping over the strawberries.
- Drizzle chocolate sauce over the whipped topping and sprinkle with chopped hazelnuts.
- Cover the dish with plastic wrap and refrigerate for at least 4 hours, or preferably overnight, to set the layers.
- Slice the cake into squares and serve chilled. Enjoy the sweet and fruity goodness of this no-bake dessert!