why make this recipe
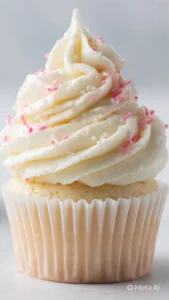
Stabilized whipped cream is perfect for making delicious desserts like cakes, cupcakes, or pie toppings. The stabilization helps the whipped cream keep its shape, making it great for decorating and serving. Unlike regular whipped cream, this version stays fluffy and does not lose volume over time. It’s simple to make and adds a creamy, sweet touch to any dessert.
how to make Stabilized Whipped Cream
Ingredients:
- 1 cup heavy whipping cream
- 2 tablespoons powdered sugar
- 1 teaspoon vanilla extract
- 1 teaspoon gelatin (optional, for stabilization)
Directions:
- In a small bowl, sprinkle the gelatin over 2 tablespoons of cold water and let it sit for a few minutes to bloom. If using gelatin, heat it gently until dissolved, then let it cool slightly.
- In a mixing bowl, combine the heavy whipping cream, powdered sugar, and vanilla extract.
- Using an electric mixer, whip the cream on medium-high speed until soft peaks form.
- Gradually add the dissolved gelatin (if using) while continuing to whip until stiff peaks form.
- Use immediately or refrigerate for up to 1 week.
how to serve Stabilized Whipped Cream
You can serve stabilized whipped cream on top of cakes, cupcakes, or pies. It’s also delightful with fresh fruit or as a topping for hot chocolate or coffee. You can use a piping bag to create beautiful designs if you’re feeling creative.
how to store Stabilized Whipped Cream
Store any leftover stabilized whipped cream in an airtight container in the refrigerator. It can last up to a week. If you notice that it begins to separate, just give it a gentle whip before using it again.
tips to make Stabilized Whipped Cream
- Make sure your mixing bowl and beaters are cold for best results. Chill them in the fridge or freezer for a few minutes beforehand.
- If you don’t have gelatin, you can use instant pudding mix instead. Just add it to the cream along with the sugar and vanilla.
- Always add the sugar gradually to ensure it dissolves well in the cream.
variation
You can flavor the whipped cream by adding different extracts, like almond or mint, in place of vanilla. You can also incorporate cocoa powder for a chocolate whipped cream or citrus zest for a fruity twist.
FAQs
Can I make this whipped cream without gelatin?
Yes, you can still make whipped cream without gelatin. Just skip it, but remember it won’t hold its shape as long.
How long can I keep stabilized whipped cream?
You can keep stabilized whipped cream in the refrigerator for up to one week.
Can I use this whipped cream for frosting a cake?
Absolutely! Stabilized whipped cream is excellent for frosting cakes, as it holds up well and looks great.

Stabilized Whipped Cream
Ingredients
Method
- In a small bowl, sprinkle the gelatin over 2 tablespoons of cold water and let it sit for a few minutes to bloom. If using gelatin, heat it gently until dissolved, then let it cool slightly.
- In a mixing bowl, combine the heavy whipping cream, powdered sugar, and vanilla extract.
- Using an electric mixer, whip the cream on medium-high speed until soft peaks form.
- Gradually add the dissolved gelatin (if using) while continuing to whip until stiff peaks form.
- Use immediately or refrigerate for up to 1 week.