Why Make This Recipe
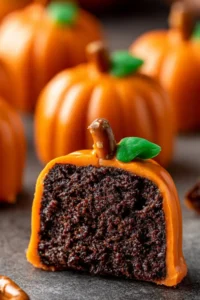
No-Bake Pumpkin Shaped Oreo Balls are an exciting treat for any celebration, especially in the fall season. They are easy to make and require no baking, making them perfect for all ages. These little pumpkin treats not only look adorable but also deliver a delicious combination of rich chocolate and creamy filling. They are a fun project for kids and a delightful addition to your seasonal dessert table.
How to Make No-Bake Pumpkin Shaped Oreo Balls
Ingredients:
- Oreo cookies
- Cream cheese
- Orange candy melts
- Chocolate chips
- Sprinkles
Directions:
- Crush Oreo cookies into fine crumbs and mix with cream cheese until well combined.
- Form the mixture into small balls and shape them into pumpkin shapes.
- Melt the orange candy melts and dip each pumpkin into the melted candy, coating completely.
- Place on a parchment-lined baking sheet.
- Use chocolate chips for the pumpkin stems and add sprinkles if desired.
- Let set until the coating hardens, then serve.
How to Serve No-Bake Pumpkin Shaped Oreo Balls
These delightful pumpkin-shaped Oreo balls can be served on a festive platter or in small dessert cups. They make a perfect treat for Halloween parties, Thanksgiving gatherings, or any fall celebration. Consider adding a decorative touch by placing them on a bed of colorful fall leaves or using themed serving dishes.
How to Store No-Bake Pumpkin Shaped Oreo Balls
To keep your pumpkin balls fresh, store them in an airtight container in the refrigerator. They can last for about a week, but they are usually best enjoyed within the first few days. Avoid leaving them at room temperature for too long to prevent the candy coating from melting.
Tips to Make No-Bake Pumpkin Shaped Oreo Balls
- Be sure to crush the Oreo cookies finely for a smooth texture.
- For easier shaping, refrigerate the mixture for about 15-30 minutes before forming the balls.
- If you’d like a more vibrant orange color, you can add a bit of food coloring to the melted candy melts.
- Get creative with the sprinkles! Choose Halloween-themed sprinkles for an extra festive touch.
Variation
If you’re looking for a twist on the original recipe, try using different flavors of Oreo cookies, such as pumpkin spice or peanut butter. You can also coat the Oreo balls in white or dark chocolate instead of orange candy melts for a different taste and look.
FAQs
Can I use regular cream cheese instead of flavored?
Yes, regular cream cheese works perfectly in this recipe. It will give the perfect creamy texture.
How long does it take for the chocolate coating to harden?
It usually takes about 30 minutes for the coating to set in the refrigerator.
Can I freeze these Oreo balls?
Yes, you can freeze the pumpkin Oreo balls. Just make sure they are in an airtight container. Thaw them in the refrigerator before serving.

No-Bake Pumpkin Shaped Oreo Balls
Ingredients
Method
- Crush Oreo cookies into fine crumbs and mix with cream cheese until well combined.
- Refrigerate the mixture for 15-30 minutes for easier shaping.
- Form the mixture into small balls and shape them into pumpkin shapes.
- Melt the orange candy melts and dip each pumpkin into the melted candy, coating completely.
- Place on a parchment-lined baking sheet.
- Use chocolate chips for the pumpkin stems and add sprinkles if desired.
- Let set until the coating hardens, then serve.